Hey & Welcome!
I realized after creating this guide that it looks much better/clearer on desktop vs. mobile. Some of the screenshots on mobile look a bit blurry but on desktop they are clear.
In the last email I sent with the 3 questions I asked, this is exactly what I did. I really appreciate everyone who participated in this survey (144 people did!).
The open rates and CTR on that email were incredible (see campaign performance screenshot directly below).
I can now segment these 144 people based on what type of business they have/work for, what email provider they use, and even how much revenue their business generates annually. This insight is so incredibly powerful!For each answer someone selected, I had it setup to automatically add the property to their profile. See my profile below so you can understand how it looks.
So now that you’ve seen a few use cases on the agency side. Let’s dive into some use cases on the brand side and how to set this up (which can be used for any type of business on Klaviyo).
This can be used In your newsletter campaigns, add buttons that let users specify how many times a week they want to receive emails from you.
This can be used in a welcome email to a new subscriber, prompting the recipient to update profile details such as gender.
This can be used in a winback email, prompting a customer to choose the category of products they are most interested in learning more about.
And many other use cases!
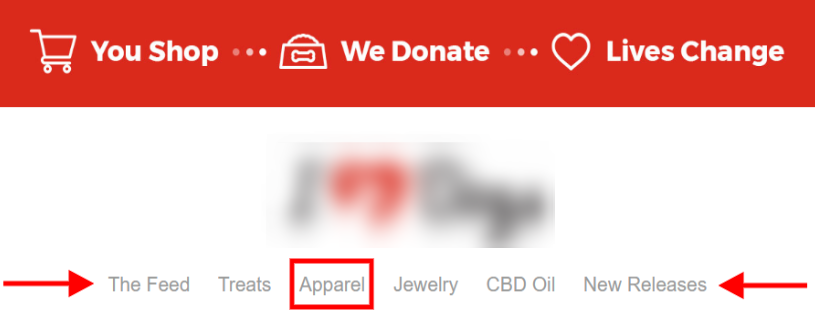
Here is a real example of how we use it for one of our clients (tried to blur their logo out). In this example, we’ve added custom tracking links to each of the product navigation categories.
So The Feed, Treats, Apparel, and so on, each of these buttons has its own special tracking link. So depending on what people are interested in (indicated by what they click) we’ll be able to automatically add a custom property to each recipient's profile.
So because I personally clicked on apparel, this is how my profile looks.
For each category, we have a specific flow that people then get dropped into which has very relevant and personalized content. You can see a snapshot of the performance (strong open rate and CTR) for people interested in apparel over the last 30 days.
Here’s an example of the content we have for those subscribers who are interested in apparel.
So we have this same type of setup for all the other categories you saw (the feed, treats, jewelry, and so on). Now onto how to create these magical tracking links.
IMPORTANT NOTE: This only works for links or buttons. Sadly Klaviyo doesn’t have the capability to make this work with images. I’m not sure whether or not this will be possible in the future but as of now, just know that it won’t work for images.
In order to redirect a button to first collect information about the recipient as a property and then redirect them to a URL, use the 'update_property_link' tag. From the email template editor, add a button to the email template you want to use. Next, click on the button where you want to add this feature. Navigate to the Block tab, and enter the following into the Link URL section.
{% update_property_link 'profile_property' 'property_value' 'redirect_link' %}
From there, you will change each section of the code to reflect:
'profile_property': the profile property that you'd like to update or create; for example, gender
'property_value': the value that the particular button corresponds to; for example, female
'redirect_link': the URL that you want them to redirect them to after they click the button
Recipients can only select one value. If they already have a value for the property set, their selection will overwrite the existing value.
So for example, with the survey I created that you guys saw, here’s how my tracking links looked for the first question: What best describes your current role?
Agency {% update_property_link 'current role' 'agency' 'https://docs.google.com/document/d/14wEbAizc6UleN7DhjmX1RImNMtPQzH0G4Tt96Fm_nSs/edit?usp=sharing' %}
Ecom Brand {% update_property_link 'current role' 'ecommerce brand' 'https://docs.google.com/document/d/14wEbAizc6UleN7DhjmX1RImNMtPQzH0G4Tt96Fm_nSs/edit?usp=sharing' %}
Non Ecom Brand {% update_property_link 'current role' 'non ecommerce brand' 'https://docs.google.com/document/d/14wEbAizc6UleN7DhjmX1RImNMtPQzH0G4Tt96Fm_nSs/edit?usp=sharing' %}
Freelancer {% update_property_link 'current role' 'freelancer' 'https://docs.google.com/document/d/14wEbAizc6UleN7DhjmX1RImNMtPQzH0G4Tt96Fm_nSs/edit?usp=sharing' %}
Other {% update_property_link 'current role' 'other' 'https://docs.google.com/document/d/14wEbAizc6UleN7DhjmX1RImNMtPQzH0G4Tt96Fm_nSs/edit?usp=sharing' %}
I used a Google Drive link for this but you would use your website link.In the ecommerce example, this would be the link you’d use: {% update_property_link 'campaign-header' 'apparel' 'chasedimond.com/apparel' %}
Say I needed a link for jewelry for the same brand, this would be the link you’d use: {% update_property_link 'campaign-header' 'jewelry' 'chasedimond.com/jewelry' %}
Once you've started to collect data you can then start using it in your emails. This data is stored just like a regular customer property, and can be used to:
Create segments that use these properties as conditions in the definition. For example, you can create a segment of your newsletter list that only includes those with a daily email preference.
Split flows by different properties. For example, you could have a female-only post purchase flow and a male-only post purchase flow if you collect gender information.
Personalize emails using this data; for example, if you prompt someone in an email to select, let's say, their favorite product category, you can then insert this property variable into a follow-up email configured so each recipient will receive a message that says, "We've recorded your favorite product category as ____!"
I hope this was interesting and helpful!
Best,
Chase Dimond


